Walkthrough on command line based tilt series alignment (EMBO2021)
Dynamo includes a package for automated alignment and reconstruction of tilt series. This walkthrough guides users through a series of steps on how to use it in command line based mode. The GUI based alignment walkthrough shows how to operate this procedure through the GUI. Here, we go through each command one by one.
Contents
Create the workflow
The following commands create a new alignment workflow in a separate folder. Make sure Dynamo is loaded and running (as explained in the workshop page) and type the following commands into the console. Note: The workshop setup does not allow you to copy paste commands from your desktop onto the workshop server. You need to open a browser within the workshop server and copy paste the commands from there.
name = 'hivCommandLine';
folder = 'workflows';
u = dtsa(name,'--nogui','-path',folder,'fp',1);
Type whos to see a list of the variables that you just created with these commands.
Entering the data
The variable u is an object that contains several fields to interact with the workflow. The different fields can be found through autocompletion by pressing the enter key (see image below). In the following, these different fields will be used to pass our inputs to the workflow.
Basic data
Basic data can be entered using the enter field. Here we use a binned version of the first tilt series from the EMPIAR entry 10164, depicting a set of virus like particles (VLP), which is already prepared in your working directory (see workshop page for details on how to access the directory). The file of the tilt series and the angles are passed to the workflow:
u.enter.tiltSeries('b001ts001.mrc');
u.enter.tiltAngles(-57:3:60);
If necessary (not in this tutorial), you can use the discardedTiltIndices field to reject tilts that are of too bad quality using the following command (e.g., tilt 1 and 40):
u.enter.discardedTiltIndices([1,40]);
Acquisition settings
Here you can enter parameters such as Cs, nominal defocus, etc. For this tutorial we just provide the pixel size in Angstroms:
u.enter.settingAcquisition.apix(2.7);
Computation settings
We enable the use of parallel cores
u.enter.settingComputing.parallelCPUUse(1);
This will be using mainly for gold bead detection (cc computation) and reconstruction.
To use all available physical cores use:
u.enter.settingComputing.cpus('*');
Detection settings
These here are the actual design decisions when running an alignment workflow. The gold bead radius has to be known beforehand ( see GUI based alignment walkthrough on how to measure it). Binning is used internally only for quick and robust bead detection.
u.enter.settingDetection.detectionBinningFactor(1);
u.enter.settingDetection.beadRadius(16);
u.enter.settingDetection.maskRadius(28);
u.enter.templateSidelength(64);
Changing generic parameters
You can find all parameters of the individuals steps using autocompletion on the area field and then by adding step in the end. For example, the residual threshold of the tilt gap filler can be changed as follows:
u.area.indexing.step.tiltGapFiller.parameterSet.residualsThreshold(8);
Running the workflow
After setting the input parameters, the complete workflow can be run using the following command (we skip the CTF correction here). It should take about 5 minutes to run.
u.run.all('noctf',1);
Checking the results
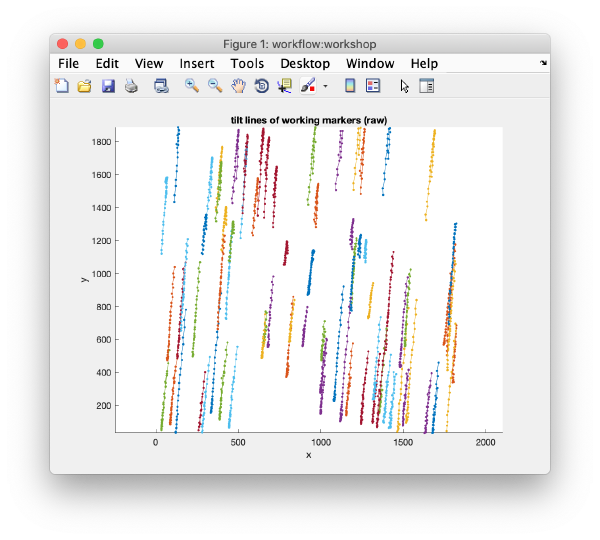
After completion, the view field allows you to check different output items for diagnose, such as the tilt lines:
u.view.tiltLines.unaligned();
or the different reconstructions
u.view.reconstruction.binnedWBP();
u.view.reconstruction.binnedSIRT();
or the aligned stacks themselves.
u.view.stack.alignedFull();
You can also use the autocompletion of the info field (as shown in the beginning) to find and display different logs:
>> u.info.fit;
------------------------------------------------------------
File with info:
  workflows/hivCommandLine.AWF/info/fitting.doc
- - - - - - - - - - - - - - - - - - - - - - - - - - - - - -
rms:  1.41
psi: 85.20
fit modus: normal
total markers: 79
total observations: 2702
fit created at: 11-Aug-2021 10:56:24
------------------------------------------------------------
>> u.info.markers;
------------------------------------------------------------
Info on working markers [used during detection, indexing refinement]
  ... item saved and in memory
Item in memory:
Number of shapes          :  79
Number of frames          :  40
Number of observations    :  2702 (out of 3160)
Number of empty frames    :  1
Number of complete frames :  0
Number of complete shapes :  0

Item in disk:
Markers in disk and currently in memory contain equal coordinates

- - - - - - - - - - - - - - - - - - - - - - - - - - - - - -

Info on final markers [used from alignment step]
  ... item saved and in memory
Item in memory:
Number of shapes          :  79
Number of frames          :  40
Number of observations    :  2702 (out of 3160)
Number of empty frames    :  1
Number of complete frames :  0
Number of complete shapes :  0

Item in disk:
Markers in disk and currently in memory contain equal coordinates
------------------------------------------------------------

