Difference between revisions of "Delft Workshop 2017"
| (27 intermediate revisions by the same user not shown) | |||
| Line 3: | Line 3: | ||
== Preinstalling the software== | == Preinstalling the software== | ||
| − | We suggest students to download, install and test the software ''before'' departing for the workshop. Data should also be downloaded beforehand. | + | We suggest students to download, install and test the software ''before'' departing for the workshop. Data should also be downloaded beforehand. Also note that you '''might need admin privileges''' to complete the steps below. Make sure that you have access to admin credentials on your laptop. |
| + | |||
| + | You can use ''Dynamo'' with or without Matlab ([[standalone]] modus). We advice you to use it '''under''' Matlab. | ||
=== Downloading ''Dynamo'' === | === Downloading ''Dynamo'' === | ||
| Line 19: | Line 21: | ||
==== Testing your standalone installation ==== | ==== Testing your standalone installation ==== | ||
| − | Activate your installation by typing in a Linux shell the activation script: | + | Activate your installation to work in standalone modus by typing in a Linux shell the activation script: |
<tt> source <path to installation>/dynamo_activate_linux_shippedMCR.sh</tt> | <tt> source <path to installation>/dynamo_activate_linux_shippedMCR.sh</tt> | ||
| Line 31: | Line 33: | ||
<tt>dynamo</tt> | <tt>dynamo</tt> | ||
| − | You should get the ''Dynamo'' prompt. | + | You should get the standalone ''Dynamo'' prompt in your terminal: |
| + | |||
| + | <tt>Dynamo > </tt> | ||
| + | |||
| + | It might take some time till it is operative (between seconds and minutes). | ||
=== Free license for Matlab === | === Free license for Matlab === | ||
| Line 56: | Line 62: | ||
A virtual machine can be downloaded [https://www.virtualbox.org/wiki/Downloads here]. A detailed walkthrough on the diverse steps can be [https://www.engadget.com/2009/09/07/how-to-set-up-ubuntu-linux-on-a-mac-its-easy-and-free found here] | A virtual machine can be downloaded [https://www.virtualbox.org/wiki/Downloads here]. A detailed walkthrough on the diverse steps can be [https://www.engadget.com/2009/09/07/how-to-set-up-ubuntu-linux-on-a-mac-its-easy-and-free found here] | ||
| + | |||
| + | === Instructions for Windows users === | ||
| + | |||
| + | Windows is not the native development platform of ''Dynamo''. We provide Windows versions of it (tested on Windows 7), but cannot guarantee that they'll work in other Windows systems. | ||
| + | |||
| + | The standalone for Windows will be uploaded [https://drive.google.com/open?id=0B_T9apWxsZjMQkEtNzJVdlFVSzQ in this google drive link] . | ||
| + | |||
| + | ==== Activating the Windows standalone ==== | ||
| + | |||
| + | In DOS terminal write: | ||
| + | |||
| + | <tt>C:\ <path to the Dynamo installation>\dynamo_activate_windows.bat </tt> | ||
| + | |||
| + | then open a ''Dynamo'' terminal by typing in the DOS | ||
| + | |||
| + | <tt>dynamo</tt> | ||
| + | |||
| + | If it doesn't work, type: | ||
| + | |||
| + | <nowiki> set PATH=%PATH%;%MCR_ROOT%\runtime\win64</nowiki> | ||
| + | |||
| + | and then '''again''' | ||
| + | |||
| + | <tt>C:\ <path to the Dynamo installation>\dynamo_activate_windows.bat </tt> | ||
| + | . | ||
| + | ==== Preparing your Matlab in Windows ==== | ||
| + | '''If''' the standalone fails, a Matlab trial version should be used. Please download it from Mathworks. | ||
| + | In order to check if your system has all the libraries needed to run ''Dynamo'', write in the Matlab shell | ||
| + | |||
| + | <tt>run <path to installation>/dynamo_activate.m</tt> | ||
| + | |||
| + | If the activation fails, you need to compile (i.e. 'mex') some files. These requieres to have a compiler on your system. Write | ||
| + | |||
| + | <tt>mex -setup</tt> | ||
| + | |||
| + | in the Matlab shell. | ||
| + | |||
| + | ==== Installing a C++ compiler for windows ==== | ||
| + | |||
| + | This will direct you to install a c++ compiler specific for the Matlab-Windows (<tt>MinGW-w64</tt>). You just need to follow the instructions on screen. Should take less than three minutes. | ||
| + | |||
| + | When the compiler is installed, run | ||
| + | |||
| + | <tt>mex -setup</tt> | ||
| + | |||
| + | to check that the system recognizes it. Then run <tt>dynamo_activate.m</tt> again. | ||
== Data == | == Data == | ||
| Line 64: | Line 116: | ||
wget https://wiki.dynamo.biozentrum.unibas.ch/w/doc/data/fhv/crop.rec </nowiki> | wget https://wiki.dynamo.biozentrum.unibas.ch/w/doc/data/fhv/crop.rec </nowiki> | ||
| − | == | + | == Accessing Delft servers == |
| − | + | There is the possibility of connecting to a GPU machine provided by TU Delft. The machine <tt>hpc04.tudelft.net</tt> has 8 GPUs installed. Number crunching will be extremely fast here, although graphical response will be probably sluggish when visualizing tomograms. | |
| − | === | + | === Accessing the remote machine === |
| − | We need to create a command terminal. Right click on the screen and select <tt>Open Terminal in the menu</tt> . A Linux command window will popup. | + | For linux and Mac users, open a terminal on your laptop and type |
| − | < | + | |
| − | + | <tt>ssh -Y <user>@hpc04.tudelft.net</tt> | |
| + | |||
| + | User accounts will be distributed during the workshop. | ||
| + | |||
| + | Windows users do the same through their preinstalled virtual box. | ||
| + | |||
| + | === Opening a Linux terminal in the remote machine === | ||
| + | |||
| + | We need to create a command terminal. Right click on the screen and select <tt>Open Terminal in the menu</tt> . A Linux command window will popup. You can check the GPUS in the machine through writing: | ||
| + | |||
| + | <tt>nvidia-smi</tt> | ||
=== Starting ''Dynamo''=== | === Starting ''Dynamo''=== | ||
| − | In the Linux terminal, open | + | In the Linux terminal on <tt>hpc04.tudelft.net</tt> , we first need to make Matlab accessible invoking the corresponding module: |
| + | |||
| + | <tt>module load matlab</tt> | ||
| + | |||
| + | and then open it through: | ||
<tt>matlab & </tt> | <tt>matlab & </tt> | ||
| Line 82: | Line 148: | ||
it will take some secons. Then, in the Matlab window write: | it will take some secons. Then, in the Matlab window write: | ||
| − | <tt> run | + | <tt> run <PATH TO DYNAMO> /dynamo/dynamo_activate.m </tt> |
This will activate ''Dynamo'' in the current Matlab session. | This will activate ''Dynamo'' in the current Matlab session. | ||
| − | |||
| − | |||
| − | |||
| − | |||
== Program== | == Program== | ||
| Line 108: | Line 170: | ||
In the afternoon session, participants will proceed to work on their own with the [[advanced starters guide| advanced introduction]] on a reduced data set from a real tomogram. | In the afternoon session, participants will proceed to work on their own with the [[advanced starters guide| advanced introduction]] on a reduced data set from a real tomogram. | ||
| − | + | [[ File:FhvTmsliceUpdates.png |thumb|right|400px| [[Advanced starters guide | FHV tutorial on isolated membrane events (advanced starters guide)]] ]] | |
| − | |||
=== Further walkthroughs === | === Further walkthroughs === | ||
| Line 119: | Line 180: | ||
{|style="margin: 0 auto;" | {|style="margin: 0 auto;" | ||
| − | | [[File:HivBox.png|thumb|center| | + | | [[File:HivBox.png|thumb|center|200px| [[Walkthrough for lattices on vesicles | HIV tutorial on densely packed slices]] ]] |
| − | | [[ File:TemplateMatchingIntoCatalogueZoom.png|thumb| center | | + | | [[ File:TemplateMatchingIntoCatalogueZoom.png|thumb| center |355px| template matching]] |
| − | | [[ File:Fhv3dAntialiasing. | + | | [[ File:Fhv3dAntialiasing.png|thumb| center |360px| creation of 3d scenes]] |
|} | |} | ||
Latest revision as of 12:51, 31 August 2017
A guide to use Dynamo during the TU Delft workshop for Cryo-EM. This covers the afternoon session of the 6th of September of 2017.
Contents
Preinstalling the software
We suggest students to download, install and test the software before departing for the workshop. Data should also be downloaded beforehand. Also note that you might need admin privileges to complete the steps below. Make sure that you have access to admin credentials on your laptop.
You can use Dynamo with or without Matlab (standalone modus). We advice you to use it under Matlab.
Downloading Dynamo
Download the package in these google links for linux or Mac respectively. After download (~4Gb), proceed to install and test
To install it, first create a folder in your filesystem in an arbitrary location of your choice:
mkdir <path to installation folder>
and untar the downloaded tarball into it:
tar -xf <tar file> -C <path to installation folder>
Testing your standalone installation
Activate your installation to work in standalone modus by typing in a Linux shell the activation script:
source <path to installation>/dynamo_activate_linux_shippedMCR.sh
or correspondingly for Mac:
source <path to installation>/dynamo_activate_mac_shippedMCR.sh
and then, to test the activated installation, just type in the terminal:
dynamo
You should get the standalone Dynamo prompt in your terminal:
Dynamo >
It might take some time till it is operative (between seconds and minutes).
Free license for Matlab
If the standalone installation works, you don't need to install further elements. However, we advice you to preinstall Matlab on your laptop. This makes the work with Dynamo much easier
You can get a trial version of Matlab and install it on your laptop. The license will be valid for 30 days. After installing Matlab, you can download the Dynamo version for your platform.
Testing your Matlab installation
Inside the Matlab shell type:
run <path to installation>/dynamo_activate.m
Virtual machines
If your system does not recognize the libraries provided in your package, you always have the option of installing a Virtual Machine in your system that emulates the Ubuntu distribution of linux. In this environment, Dynamo will run without errors, although the performance of the graphics system will be severely decreased. We recommend to use this device as a last resource.
Download an Ubuntu distribution
The version 16.04.3 of Ubuntu can be download as an iso file here
Download the virtual machine
A virtual machine can be downloaded here. A detailed walkthrough on the diverse steps can be found here
Instructions for Windows users
Windows is not the native development platform of Dynamo. We provide Windows versions of it (tested on Windows 7), but cannot guarantee that they'll work in other Windows systems.
The standalone for Windows will be uploaded in this google drive link .
Activating the Windows standalone
In DOS terminal write:
C:\ <path to the Dynamo installation>\dynamo_activate_windows.bat
then open a Dynamo terminal by typing in the DOS
dynamo
If it doesn't work, type:
set PATH=%PATH%;%MCR_ROOT%\runtime\win64
and then again
C:\ <path to the Dynamo installation>\dynamo_activate_windows.bat .
Preparing your Matlab in Windows
If the standalone fails, a Matlab trial version should be used. Please download it from Mathworks. In order to check if your system has all the libraries needed to run Dynamo, write in the Matlab shell
run <path to installation>/dynamo_activate.m
If the activation fails, you need to compile (i.e. 'mex') some files. These requieres to have a compiler on your system. Write
mex -setup
in the Matlab shell.
Installing a C++ compiler for windows
This will direct you to install a c++ compiler specific for the Matlab-Windows (MinGW-w64). You just need to follow the instructions on screen. Should take less than three minutes.
When the compiler is installed, run
mex -setup
to check that the system recognizes it. Then run dynamo_activate.m again.
Data
Data should be downloaded beforehand:
wget  https://wiki.dynamo.biozentrum.unibas.ch/w/doc/data/hiv/v17.rec
wget  https://wiki.dynamo.biozentrum.unibas.ch/w/doc/data/t20s/t20s.mrc
wget  https://wiki.dynamo.biozentrum.unibas.ch/w/doc/data/fhv/crop.rec
Accessing Delft servers
There is the possibility of connecting to a GPU machine provided by TU Delft. The machine hpc04.tudelft.net has 8 GPUs installed. Number crunching will be extremely fast here, although graphical response will be probably sluggish when visualizing tomograms.
Accessing the remote machine
For linux and Mac users, open a terminal on your laptop and type
ssh -Y <user>@hpc04.tudelft.net
User accounts will be distributed during the workshop.
Windows users do the same through their preinstalled virtual box.
Opening a Linux terminal in the remote machine
We need to create a command terminal. Right click on the screen and select Open Terminal in the menu . A Linux command window will popup. You can check the GPUS in the machine through writing:
nvidia-smi
Starting Dynamo
In the Linux terminal on hpc04.tudelft.net , we first need to make Matlab accessible invoking the corresponding module:
module load matlab
and then open it through:
matlab &
it will take some secons. Then, in the Matlab window write:
run <PATH TO DYNAMO> /dynamo/dynamo_activate.m
This will activate Dynamo in the current Matlab session.
Program
Introduction to tomography and subtomogram averaging
30 minutes of presentation to introduce tomography, subtomogram averaging and Dynamo.
Tutorial 1: Getting started
Morning session.
on screen presentation/hands-on practical. The presentation will loosely the introductory materials in:
- tutorial on basic elements: help, data and metadata formats.
- tutorial on the basic concept in Dynamo alignment: the project.
After the introduction of these general concepts, will follow together the basic hands-on tutorial of Dynamo.
Advanced getting started
In the afternoon session, participants will proceed to work on their own with the advanced introduction on a reduced data set from a real tomogram.
Further walkthroughs
Further walkthroughs are available for participants that complete this, they can be chosen according to the particular interests:
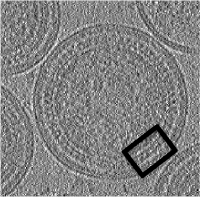
- Treatment of densely packed spherical geometry (~1 hour)
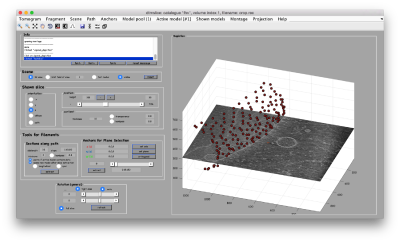
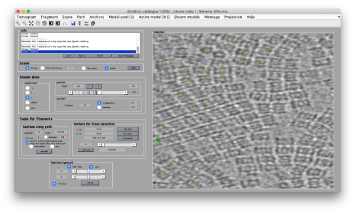
- walkthrough for automated identification of proteosomes on a real tomogram through template matching. (~1 hour)
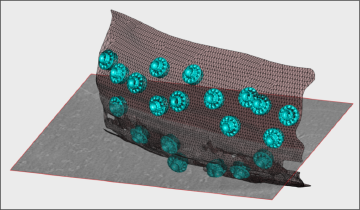
- Walkthrough on the FHV data set (~1hour)
Instructors
- Daniel Castaño-Díez, BioEM Lab, University of Basel
- Paula Pérez-Navarro, C-CINA, University of Basel
- Cynthia Taveneau, Institut Curie, Paris


