Difference between revisions of "Membrane models"
| (11 intermediate revisions by the same user not shown) | |||
| Line 1: | Line 1: | ||
The input of a membrane model is a set of points defined typically in several z-slices of a tomogram. Through the workflow specific for this model geometry, ''Dynamo'' will create a smooth continuous surface that represents the membrane. | The input of a membrane model is a set of points defined typically in several z-slices of a tomogram. Through the workflow specific for this model geometry, ''Dynamo'' will create a smooth continuous surface that represents the membrane. | ||
The output is a set of crop points and orientations. Each orientation will point in the direction of the outwards normal. The membrane model '''needs''' to have a center defined, which is merely used to defined the laterality of the surface (which side is "inward" and which side is "outward" ) | The output is a set of crop points and orientations. Each orientation will point in the direction of the outwards normal. The membrane model '''needs''' to have a center defined, which is merely used to defined the laterality of the surface (which side is "inward" and which side is "outward" ) | ||
| + | |||
| + | =Input points in dtmslice= | ||
| + | |||
| + | There are different ways to enter points to a membrane model through [[dtmslice]]. In all of them, the idea is to select different z-planes and introduce membrane points by clicking on them. The slices don't need to be accessed in any order. However, the set of points clciked in a given slice is assumed to be ''ordered''. ''Dynamo'' will create a spline cureve that defines this "z-level" of the membrane through an smooth approximation to the path of the points. | ||
| + | |||
| + | == Directly in the dtmslice scene == | ||
| + | |||
| + | This is the easiest way: you can just open the tomogram, zoom into the region of interest (with the control [=] or without a box [v]) and select different ''z'' slices. On each slice, click on several points in the membrane with the key [c]. | ||
| + | |||
| + | This procedure works well when you don't need a lot precision when moving to a ''z'' plane to the next one. | ||
| + | |||
| + | == Through the montage viewer == | ||
| + | |||
| + | {{ main | montage viewer for membrane picking | montage viewer for membrane picking}} | ||
| + | |||
| + | This option is more complicated to learn, but it pays off in several situations: | ||
| + | * many membranes are present in one tomogram, | ||
| + | * you want to define precisely and (consequently for all models) the step between two z-levels, or | ||
| + | * you want to use the automated tracker. | ||
| + | |||
| + | == Center input == | ||
| + | |||
| + | Whichever input system you use, remember that you need to provide to the model a <tt>center</tt> point. This point is merely used to determine which side of the membrane is considered interior and which one is considered exterior. | ||
| + | |||
| + | The center is provided by <tt>[shift+c]</tt> both in dtmslice or in the montage view. | ||
| + | |||
= Workflow description= | = Workflow description= | ||
| − | The procedural steps | + | The procedural steps after the input of the user points are the same both from the GUI and the command line: |
# Creation of control points. | # Creation of control points. | ||
# Creation of a supporting mesh. | # Creation of a supporting mesh. | ||
| Line 10: | Line 36: | ||
# Extraction of the table points. | # Extraction of the table points. | ||
The property <tt>center</tt> must have been defined. | The property <tt>center</tt> must have been defined. | ||
| + | |||
| + | {|style="margin: 0 auto;" | ||
| + | | [[File:membraneWorkflowUserPoints.png|thumb|upright|250px| User points]] | ||
| + | | [[File:membraneWorkflowControlPoints.png|thumb|upright|250px| Control points]] | ||
| + | | [[File:membraneWorkflowMesh.png|thumb|upright|250px| Coarse depiction mesh]] | ||
| + | |} | ||
| + | |||
| + | {|style="margin: 0 auto;" | ||
| + | | [[File:membraneWorkflowRefinedMesh.png|thumb|upright|250px| Refined depiction mesh]] | ||
| + | | [[File:membraneWorkflowCropMesh.png|thumb|upright|250px| Cropping mesh points]] | ||
| + | | [[File:membraneWorkflowTableSketch.png|thumb|upright|250px| Cropping points and angles]] | ||
| + | |} | ||
== Control points== | == Control points== | ||
Control points are equispaced points distributed along all user points defined for a same level (typically ''z''). They are used as vertices for the initial triangulation that will be used to represent the continuous surface. <br> | Control points are equispaced points distributed along all user points defined for a same level (typically ''z''). They are used as vertices for the initial triangulation that will be used to represent the continuous surface. <br> | ||
The original points need to have been picked in the right order on each z-level.<br> | The original points need to have been picked in the right order on each z-level.<br> | ||
| − | They are stored in the <tt>crop_points</tt>property of the model. | + | They are stored in the <tt>crop_points</tt> property of the model. |
== Supporting mesh == | == Supporting mesh == | ||
| Line 27: | Line 65: | ||
# Refine the supporting triangulation one (or more) step(s) further, or | # Refine the supporting triangulation one (or more) step(s) further, or | ||
# Provide a smaller value for <tt>crop_mesh_parameter</tt> | # Provide a smaller value for <tt>crop_mesh_parameter</tt> | ||
| + | |||
| + | Policies for selection of the crop mesh parameter are discussed in the [[seed oversampling article.]] | ||
== Table points == | == Table points == | ||
This is merely a formatting step. In this point is crucial that the <tt>center</tt> property in the model has been already defined. | This is merely a formatting step. In this point is crucial that the <tt>center</tt> property in the model has been already defined. | ||
| − | = | + | = Command line = |
The methods that represent the steps are: | The methods that represent the steps are: | ||
| − | * <tt> | + | * <tt>controlUpdate</tt> |
*<tt>createMesh</tt> | *<tt>createMesh</tt> | ||
*<tt>refineMesh</tt> | *<tt>refineMesh</tt> | ||
| − | *<tt>createCropMesh</tt> | + | *<tt>createCropMesh</tt><br />whose main parameter is <tt>crop_mesh_parameter</tt> |
| − | <br />whose main parameter is <tt>crop_mesh_parameter</tt> | ||
*<tt>updateCrop</tt> | *<tt>updateCrop</tt> | ||
| − | An example can be found in [Example of membrane model workflow through the command line] | + | An example can be found in [[Example of membrane model workflow through the command line]] |
Latest revision as of 11:18, 28 February 2017
The input of a membrane model is a set of points defined typically in several z-slices of a tomogram. Through the workflow specific for this model geometry, Dynamo will create a smooth continuous surface that represents the membrane. The output is a set of crop points and orientations. Each orientation will point in the direction of the outwards normal. The membrane model needs to have a center defined, which is merely used to defined the laterality of the surface (which side is "inward" and which side is "outward" )
Contents
Input points in dtmslice
There are different ways to enter points to a membrane model through dtmslice. In all of them, the idea is to select different z-planes and introduce membrane points by clicking on them. The slices don't need to be accessed in any order. However, the set of points clciked in a given slice is assumed to be ordered. Dynamo will create a spline cureve that defines this "z-level" of the membrane through an smooth approximation to the path of the points.
Directly in the dtmslice scene
This is the easiest way: you can just open the tomogram, zoom into the region of interest (with the control [=] or without a box [v]) and select different z slices. On each slice, click on several points in the membrane with the key [c].
This procedure works well when you don't need a lot precision when moving to a z plane to the next one.
Through the montage viewer
- Main article: montage viewer for membrane picking
This option is more complicated to learn, but it pays off in several situations:
- many membranes are present in one tomogram,
- you want to define precisely and (consequently for all models) the step between two z-levels, or
- you want to use the automated tracker.
Center input
Whichever input system you use, remember that you need to provide to the model a center point. This point is merely used to determine which side of the membrane is considered interior and which one is considered exterior.
The center is provided by [shift+c] both in dtmslice or in the montage view.
Workflow description
The procedural steps after the input of the user points are the same both from the GUI and the command line:
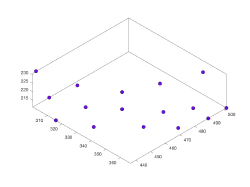
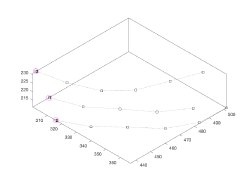
- Creation of control points.
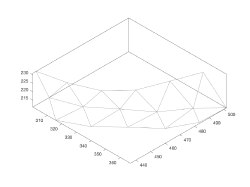
- Creation of a supporting mesh.
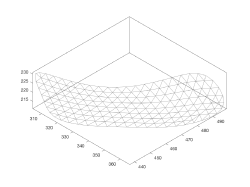
- Refinement of the supporting mesh.
- Creation of the cropping mesh.
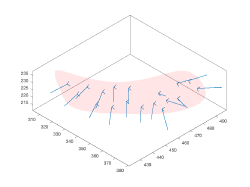
- Extraction of the table points.
The property center must have been defined.
Control points
Control points are equispaced points distributed along all user points defined for a same level (typically z). They are used as vertices for the initial triangulation that will be used to represent the continuous surface.
The original points need to have been picked in the right order on each z-level.
They are stored in the crop_points property of the model.
Supporting mesh
The continuous membrane will be represented by a triangulation, stored in the mesh property of the model.
Refining the supporting mesh
Each refinement step subdivides the triangulation stored in the mesh property of the model.
Cropping mesh
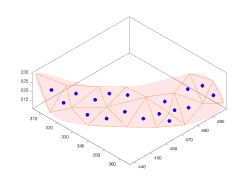
A new triangulation (property crop_mesh) will be defined on top of the membrane defined in the previous step. The final cropping points will be located in the centers of these triangles. The triangulation procedure will try to create these points on a regular distribution with a given average distance. This average distance is provided in pixels as property crop_mesh_parameter A failure to create a cropping mesh normally indicates that the supporting surface (in 'mesh') is too coarse for the expected distance between the particles. You have thus two options:
- Refine the supporting triangulation one (or more) step(s) further, or
- Provide a smaller value for crop_mesh_parameter
Policies for selection of the crop mesh parameter are discussed in the seed oversampling article.
Table points
This is merely a formatting step. In this point is crucial that the center property in the model has been already defined.
Command line
The methods that represent the steps are:
- controlUpdate
- createMesh
- refineMesh
- createCropMesh
whose main parameter is crop_mesh_parameter - updateCrop
An example can be found in Example of membrane model workflow through the command line
